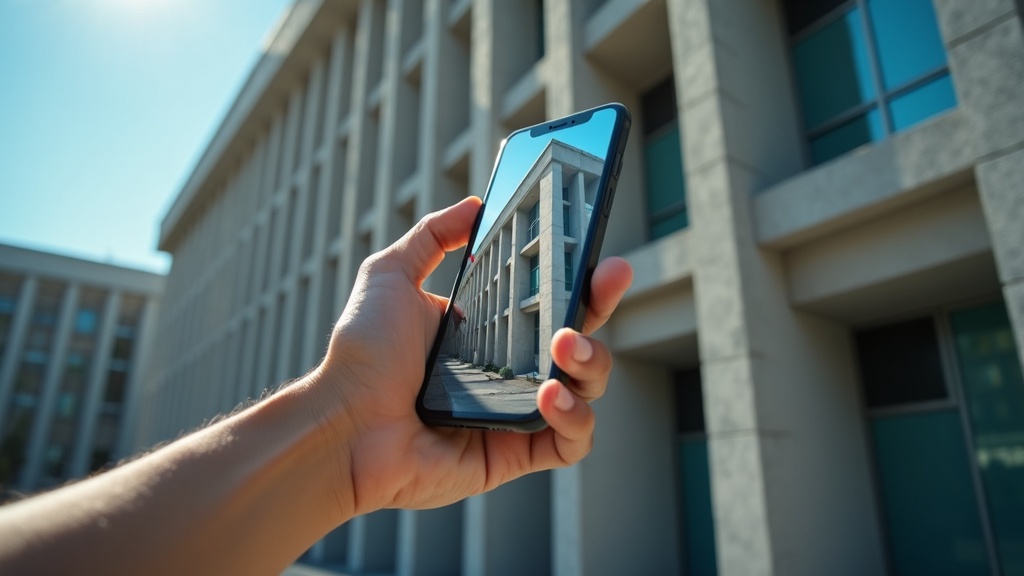
You find a great building, step back to fit the whole thing in frame, tap the shutter — and the result looks like something you’d find in a property brochure. The building is there, technically correct, but completely lifeless.
It’s not your phone. It’s where you’re standing and where you’re pointing it. Shooting straight-on is the default because it’s easy, but it’s also the fastest way to flatten something that has real depth, texture, and character.
A few deliberate shifts in position and framing change everything. No extra gear, no editing tricks — just a different way of seeing the shot before you take it.
Why shooting straight at a building kills the depth
Most people walk up to a building, point their phone straight at it, and tap the shutter. It feels like the obvious move. The building is right there — why not face it directly? The problem is that head-on position quietly strips away everything that makes a building feel real.
When you stand parallel to a facade and shoot, the camera sees a flat surface. Everything in the frame sits at roughly the same distance from you. The left edge, the right edge, the middle — all equally far away. There are no lines pulling your eye anywhere. No sense that the building has sides, depth, or scale. It looks like a photograph of a photograph.
Think about standing in a room. If you press your face against a wall and stare at it, you see almost nothing — just flat paint. But if you stand at the corner of that same room, suddenly you feel the space. Two walls angle away from you. You understand the room instantly. Buildings work exactly the same way.
This isn’t a phone thing. It happens with any camera. The moment you remove angle, you remove perspective — and perspective is what tricks the eye into feeling depth. Your phone isn’t the problem. Your position is.
Move to the corner instead of the center
Most people stop right in front of a building, center themselves, and shoot. It feels natural. But that position is exactly why the photo ends up looking like a postcard — flat, obvious, forgettable. You’re only seeing one face of the building, and one flat surface doesn’t give your eye anywhere to go.
Now try this: walk to the corner. Not necessarily all the way to the edge — even shifting to a 45-degree position, where you can see two sides of the building at once, changes everything. The two faces angle away from you in different directions, and suddenly the building has depth. You can feel that it has volume, that it exists in space.
This happens because the lines of the two faces aren’t parallel anymore — they converge. Your eye follows them. The building stops looking like a wall and starts looking like a structure.
You don’t need a special lens or any camera trick to get there. You just need to move your feet. Before you shoot anything, walk around the building a little. Look for that moment where a corner comes into view and the two sides open up. It usually takes less than ten steps sideways. That’s the shot.
Let diagonal lines do the heavy lifting
Most people point their phone straight at a building and shoot. The problem with that? Every line goes horizontal — the roofline, the rows of windows, the edge of the facade. Horizontal lines stop the eye cold. You look, and there’s nowhere to go.
A diagonal line does the opposite. It pulls you in. Your eye follows it through the frame, and suddenly the image has movement — a sense that there’s more beyond the edge of the screen.
Here’s how to get it with a smartphone. Walk to the corner of the building instead of standing in front of it. Now the facade runs away from you at an angle. That long edge, that row of windows, that repeating pattern of brickwork — all of it becomes a line that leads somewhere. The building stops being a flat wall and starts feeling like a space.
The same trick works inside. Stand at one end of a corridor with arches or columns and let them recede into the distance. Or crouch slightly at the base of a glass tower and let the vertical edge cut diagonally toward the top corner of your screen. You’re not doing anything complicated — you’re just repositioning until a strong line runs corner to corner instead of side to side.
A small shift in where you stand can be the whole difference between a photo that just sits there and one that actually draws someone in.
Put something in the foreground to create layers
Here’s something that works almost every time. Before you photograph a building, look for something closer to you that you can include in the frame — a tree branch hanging overhead, a lamppost along the edge, a person cutting across the sidewalk, or even the side of a doorway you’re standing in. Put that close thing in the shot alongside the building behind it.
The reason this works is simple. When your eye travels from something near to something far, your brain reads that as real space. The building suddenly exists at a distance. It stops being a flat surface and starts being a place.
Smartphones are actually great for this. The wide lens naturally makes close objects look noticeably bigger than things further away. That size difference does the work for you. A branch that’s two feet from your phone will look dramatically closer than the same branch shot on a camera with a longer lens.
The best foreground elements are ones you find, not ones you arrange. A fence you happen to be standing near. A café awning above you. A crowd of people already moving through the scene. You’re not decorating the photo — you’re using what’s already there to show the viewer how far away that building actually is.
Change your eye level — buildings respond well to extreme angles
Most people photograph buildings from exactly where they’re standing. You walk up, raise your phone, tap to focus, and shoot. The result looks almost identical to just… looking at the building. Your camera captured what your eyes already saw, and nothing about the image feels like a choice was made.
Try crouching down low instead. Get close to the base of a building, point the camera upward, and watch what happens to the lines. The walls stop being flat surfaces and start rushing toward a single point high in the frame. That movement is what makes an image feel like it has depth.
If you’re standing directly beneath something tall — a tower, a curved facade, a narrow alley between two buildings — try pointing your phone straight up. The structure wraps around the edges of the frame in a way that’s almost impossible to make look boring. It becomes about scale and shape, not just surface.
Smartphones actually make this work better than most cameras. Their wide lenses exaggerate perspective shifts dramatically. A small change in your physical position creates a big change in the image. You don’t need a special setting or mode — you just need to crouch down and see what the frame shows you.
Reflections are free depth — use them
Most people walk past reflections without thinking twice. That’s a mistake, because a good reflection does something a straight-on building shot almost never does — it gives you two things in one frame.
Think about a glass tower on a clear day. The facade is picking up the sky, nearby rooftops, maybe another building across the street. If you position yourself to include both the tower and what it’s reflecting, the eye gets busy. It’s reading two scenes at once, and that automatically feels more dimensional than a flat front-on shot.
Puddles work the same way. After rain, even a shallow puddle on the pavement can mirror a whole facade. Crouch down a little, get your phone close to the ground, and suddenly you have the building above and its reflection below — a natural sense of depth that costs nothing.
Shop windows are easy to overlook too. A window reflects the street behind you, which means you can capture the building you’re facing and a slice of the scene at your back, layered together in the glass.
The positioning is what makes or breaks it. You want the reflection to add something the building alone isn’t showing — a different angle, a contrasting texture, a bit of sky. If the reflection just duplicates what’s already in the shot, it’s not doing any work. Move slightly, change your angle, and you’ll find the point where it clicks.
Use doorways, arches, and gaps to frame your shot
Most people walk up to a building, stop in front of it, and take the photo. Which is fine — but the result tends to look like something from a travel brochure. Everything is visible, nothing is surprising, and the image feels flat before you’ve even looked at it properly.
There’s a simple fix hiding in almost every city block. Shoot the building through something else. An archway across the street. A gap between two walls. An iron gate left half-open. A colonnade, a tunnel entrance, a canopy of branches hanging over a path. When you put something like that between your phone and the building, the photo suddenly has a near and a far. The eye travels through the frame instead of just landing on it.
This works especially well with smartphones because you’re already moving around to find the right spot. The trick is to slow down a little and look sideways rather than straight ahead. The frame you need is usually nearby — you just have to notice it before you plant your feet.
The other thing it does is focus attention. When a building sits inside an arch or a doorway, the viewer’s eye goes straight to it. You’re not asking anyone to look at a flat surface. You’re giving them somewhere to travel.
Flat light makes flat photos — timing matters more than most people think
Most people pull out their phone and shoot a building whenever they happen to be standing in front of it. That’s completely natural. But the light at that moment might be doing your photo real damage — and you’d never know it just by looking at the building with your eyes.
When the sun is high and direct, or the sky is a thick white blanket of cloud, shadows disappear. And shadows are doing more work than you’d think. They’re what makes a surface look like a surface. Without them, a brick wall looks like a picture of a brick wall. The texture is gone. The depth is gone. The building looks printed, not built.
The same building in lower, more angled light tells a completely different story. When light comes in from the side, it catches every bump, ridge, and recess. Stone looks rough. Concrete looks heavy. Corners actually cast shadows, which means you can see that corners exist.
You don’t need to obsess over catching perfect golden light. Even a partly cloudy day with some directional light beats flat midday sun. The question to ask is simple: is the light hitting the building from the side, or is it just flooding everything evenly from above? If it’s the latter, the building will look flat no matter how clever your angle is.
Before you raise your phone, take a second to notice which face of the building the light is actually falling on — and put yourself on that side.